
How to Prepare for Embryo Transfer for Best Results
- Jan 21
- 13 min read

Starting IVF can feel like a maze, but every step gets clearer with the right strategy. Scheduling key consultations sets the foundation for your entire journey, guiding you from medical history reviews to precise embryo transfer timelines. With AI-guided embryo assessment now part of many clinics’ routines, your path to effective and affordable fertility care becomes more personalized than ever. This guide brings practical tips and essential steps for women prioritizing rapid solutions and detail-driven treatment.
Table of Contents
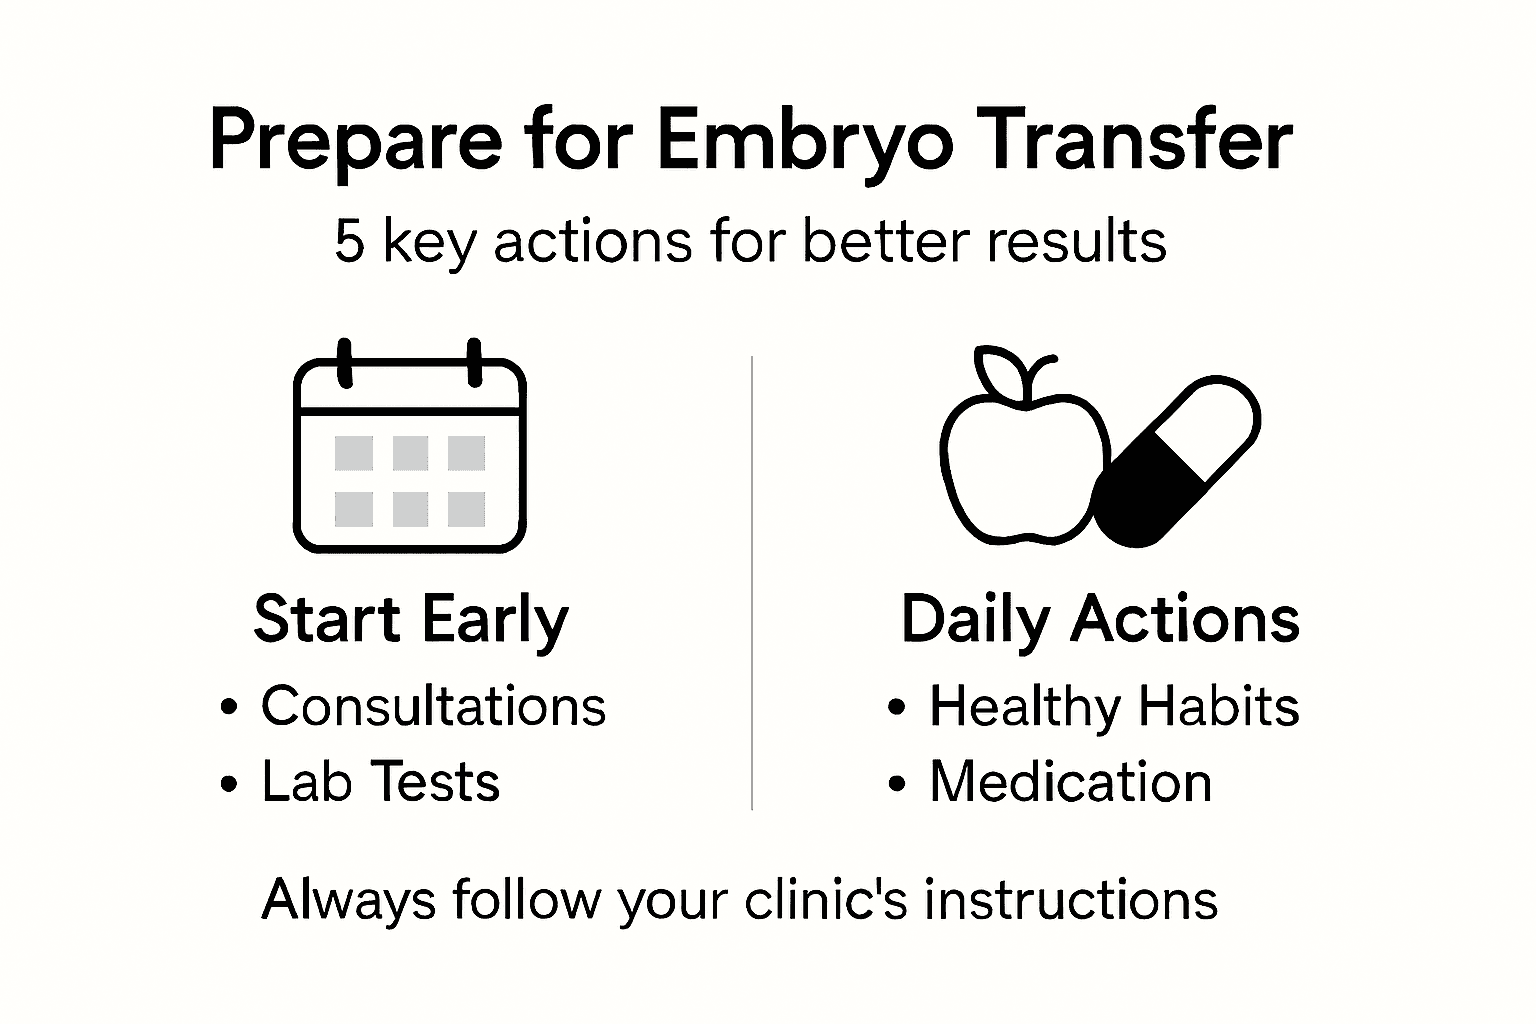
Quick Summary
Key Insight | Explanation |
1. Schedule consultations early | Book a meeting with your fertility team within two weeks to establish your personalized treatment plan. |
2. Complete necessary assessments | Conduct lab tests and AI-guided evaluations early to inform your medication protocol and timing. |
3. Adopt a healthy lifestyle | Focus on nutrition, exercise, and stress reduction to enhance your body’s receptivity for embryo implantation. |
4. Follow your medication schedule | Adhere strictly to your personalized medication plan to optimize your chances of a successful cycle. |
5. Verify timing for embryo transfer | Ensure synchronization of uterine readiness and embryo development for the highest chance of implantation success. |
Step 1: Schedule key consultations with your fertility team
Your fertility journey begins with conversations, not procedures. Scheduling consultations with your fertility team is the foundation that shapes your entire treatment plan, so this step deserves your full attention. These conversations will clarify your specific situation, establish realistic timelines, and help you understand what to expect during embryo transfer and beyond.
Start by reaching out to your fertility clinic to book an initial consultation, ideally within one to two weeks of deciding to pursue treatment. During this appointment, you’ll meet with a reproductive endocrinologist who will review your medical history in detail, including previous pregnancies, surgeries, medications, and any existing health conditions. Be prepared to discuss your partner’s medical history as well, as male factor fertility is evaluated alongside female factors. The clinic will then order diagnostic tests such as blood work and imaging to establish your baseline fertility status and create a personalized treatment strategy.
Beyond the initial consultation, you’ll want to schedule follow-up appointments with your clinic’s nursing team, counselor, and potentially an embryologist if your clinic offers this level of engagement. These consultations serve different purposes. Your nursing team walks you through medication protocols and injection techniques, your counselor discusses the emotional landscape of fertility treatment, and the embryologist explains embryo development and grading systems. Ask your clinic if they use AI-assisted embryo assessment, as this can influence how embryos are evaluated and selected for transfer. Bring a notebook or voice recorder to these appointments so you can capture specific details about medication timing, cost breakdowns, and success rate statistics relevant to your age and diagnosis. Request written summaries of each consultation, and don’t hesitate to ask for clarification on any medical terminology that feels unfamiliar.
Timing matters significantly here. Scheduling these consultations early allows your team to gather all necessary information and prepare for your transfer cycle well in advance, reducing delays once treatment officially begins. Ask about communication protocols too—specifically, whether your clinic offers direct messaging or WhatsApp support for urgent questions. This matters more than you might think, especially when you’re navigating hormone levels and medication side effects during your cycle.
Here’s a summary of key consultations and their roles in your fertility journey:
Consultation Type | Who You Meet | Main Purpose | Unique Benefit |
Initial Physician | Reproductive endocrinologist | Review health history, set timelines | Personalized treatment plan |
Nursing Team | Fertility nurse | Explain medication protocols, teach injections | Medication confidence |
Counselor | Mental health specialist | Support emotional well-being | Stress management |
Embryologist | Embryology expert | Discuss embryo grading and selection | Optimized transfer outcome |
Pro tip: Bring a list of 10 to 15 specific questions to your consultation, including your clinic’s embryo transfer success rates for your age group, whether they recommend fresh or frozen transfer protocols for your situation, and what contingency plans exist if insufficient embryos develop—having prepared questions ensures you walk out with answers rather than leaving and wishing you’d asked.
Step 2: Complete necessary labs and AI-guided assessments
Laboratory testing and AI-assisted evaluations form the backbone of your personalized treatment plan. These assessments provide your fertility team with precise data about your reproductive health, hormone levels, egg quality, and uterine readiness for embryo transfer. Completing these tests early in your cycle allows your clinic to make informed decisions about timing, medication adjustments, and embryo selection strategies that maximize your chances of success.
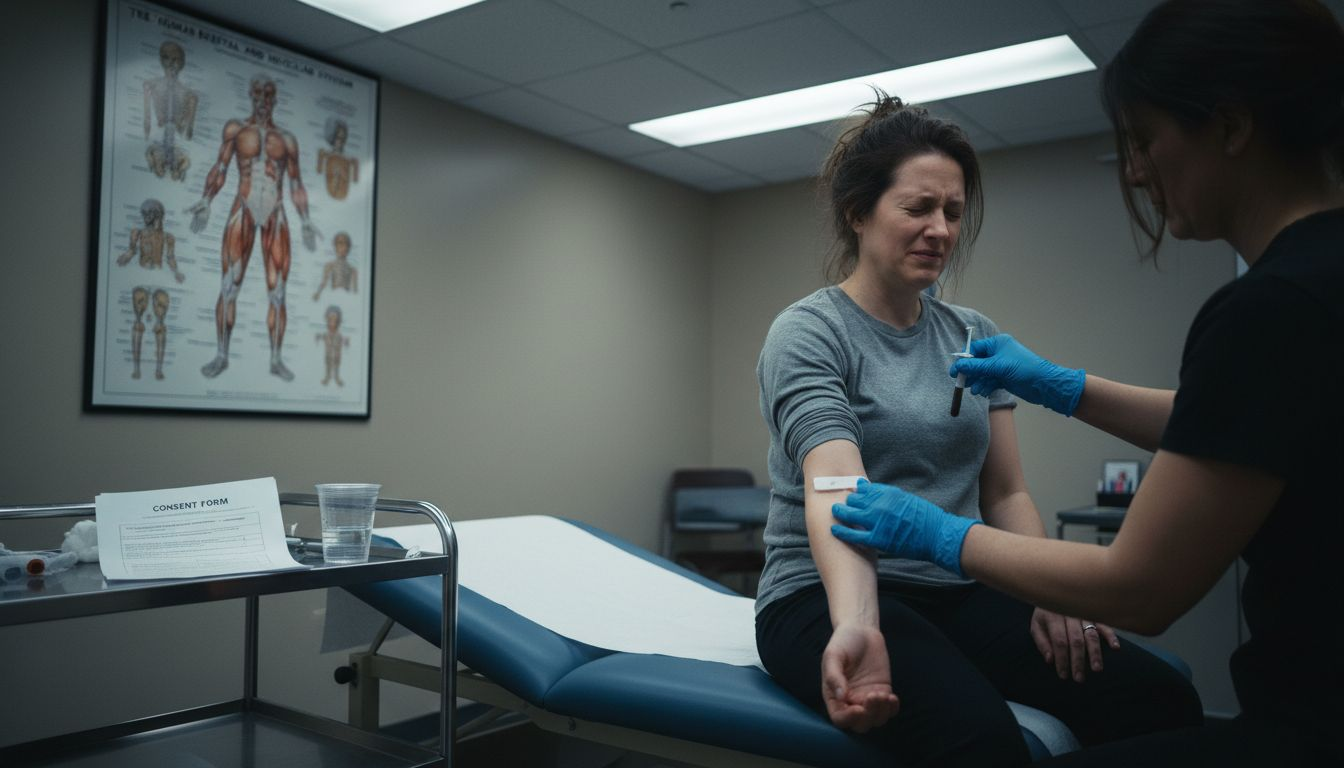
Start with standard bloodwork during the first few days of your menstrual cycle, typically between days two and five. Your clinic will measure follicle stimulating hormone, luteinizing hormone, estradiol, and anti-Müllerian hormone levels to assess your ovarian reserve and predict how you’ll respond to stimulation medications. You’ll also have tests for infectious diseases, thyroid function, and prolactin levels, as these affect fertility. Beyond baseline hormones, your clinic may order genetic carrier screening to identify if you carry genes for certain inherited conditions, allowing for potential embryo genetic testing later. Additional imaging such as transvaginal ultrasound evaluates your ovaries and uterus, while tests for endometrial receptivity help determine the optimal timing for transfer. Comprehensive clinical and embryological evaluations before transfer, including genetic screening and advanced assessments, ensure your treatment aligns with your specific situation.
Once your basic labs are complete, discuss AI-guided assessment options with your clinic. Many fertility centers now use artificial intelligence to assess embryo quality and implantation potential, analyzing factors like cell symmetry, fragmentation patterns, and morphology with precision that human assessment alone cannot match. Ask your clinic specifically which AI tools they employ for embryo grading and endometrial receptivity analysis. Some clinics use predictive algorithms that combine your test results with population data to forecast which embryos have the highest implantation likelihood. Request a detailed explanation of how these assessments will influence your specific treatment recommendations. Don’t be afraid to ask for printed reports of your results so you can reference them throughout your cycle and understand exactly what each metric means for your situation.
Timing your labs strategically matters. Coordinate with your clinic to ensure all testing is completed before your stimulation cycle begins, giving your team adequate time to review results and adjust your medication protocol if needed. Some assessments, particularly endometrial receptivity testing, may be done in a preparatory cycle before your actual transfer cycle, so clarify this timeline with your nursing coordinator. Keep copies of all lab results and imaging reports for your records, and ask your clinic to explain any values that fall outside normal ranges in plain language rather than medical jargon.
Compare standard lab tests and AI-guided embryo evaluations for treatment planning:
Assessment Type | What It Measures | How Results Are Used | Added Value for Patients |
Standard Lab Testing | Hormone levels, infection status | Set medication, assess fertility | Foundation for personalized approach |
Genetic Screening | Inherited conditions | Identify risks, enable genetic testing | Informed embryo selection |
AI-Guided Analysis | Embryo morphology, cell symmetry | Predict implantation success | Higher accuracy in embryo selection |
Imaging/Ultrasound | Ovarian/uterine health | Confirm physical readiness | Ensures a receptive uterine environment |
Pro tip: Request that your clinic provide a written summary of all lab results with clear explanations of what each test means for your prognosis and how the AI assessments specifically influence your personalized protocol, rather than just handing you numbers and expecting you to decipher them.
Step 3: Adopt healthy lifestyle and stress-reduction routines
Your body is preparing for one of its most important tasks, and the habits you establish now directly influence how receptive your uterus becomes for embryo implantation. Creating a foundation of physical wellness and emotional calm is not optional during your transfer preparation, it is genuinely connected to your success. The weeks leading up to your transfer are the ideal time to solidify routines that optimize your reproductive environment from the inside out.
Begin by evaluating your nutrition with the understanding that food becomes medicine during this phase. Focus on consuming nutrient-dense whole foods, particularly those rich in antioxidants like leafy greens, berries, nuts, and fatty fish high in omega-3 fatty acids. Iron-rich foods such as lean red meat, lentils, and fortified cereals support healthy blood flow to your reproductive organs. Limit processed foods, refined sugars, and excessive caffeine, which can trigger inflammation and hormone imbalances. Stay hydrated consistently throughout each day, aiming for at least 8-10 glasses of water. Simultaneously, eliminate alcohol completely and avoid smoking entirely, as both substances can damage egg quality and compromise uterine receptivity. If you are overweight or underweight, work with your clinic’s nutritionist to reach a body mass index in the optimal range, as studies show that healthy lifestyle choices and stress reduction positively impact uterine receptivity and embryo implantation. This is not about achieving a specific appearance but about creating physiological conditions that support successful embryo attachment and development.
Exercise plays a crucial but balanced role during transfer preparation. Aim for 150 minutes of moderate activity per week, such as brisk walking, swimming, or gentle yoga. These activities improve cardiovascular health, reduce insulin resistance, and enhance blood circulation to your pelvis without the physical stress that high-intensity workouts can create. Avoid strenuous exercise, heavy lifting, or activities with high impact or collision risk, as these can interfere with embryo implantation once transfer occurs. Equally important is stress management, which deserves the same attention you give to diet and exercise. Chronic stress elevates cortisol levels, which can suppress reproductive hormone production and impair uterine blood flow. Establish a daily mindfulness practice, even if it is just 10 minutes of focused breathing or meditation. Consider acupuncture, which research suggests may improve implantation rates through stress reduction and improved blood flow. Schedule regular massages focused on relaxation rather than deep tissue work. Create boundaries around work obligations in the weeks before transfer, communicating with your employer or colleagues that you need reduced stress. If you work in a high-pressure environment, consider taking leave beginning 2 to 3 days before your transfer through 1 to 2 weeks afterward to prioritize rest and recovery.
Sleep quality matters more than you might realize for fertility outcomes. Aim for 7 to 9 hours of consistent sleep each night by establishing a regular bedtime and wake time, even on weekends. Keep your bedroom cool, dark, and quiet. Avoid screens for at least one hour before bed, as blue light suppresses melatonin production. If insomnia or sleep disruption becomes an issue, discuss this with your clinic before resorting to medications, as some sleep aids can affect fertility. Track your lifestyle changes in a simple journal, noting what stresses you feel improving and which routines you find most sustainable. This creates accountability and helps you identify what works best for your individual circumstances.
Pro tip: Start implementing these lifestyle changes at least 3 to 4 weeks before your scheduled transfer rather than waiting until the last moment, because your body needs time to respond physiologically to improved nutrition, exercise, and stress management, and the gradual shift will feel more sustainable than an abrupt overhaul.
Step 4: Follow personalized medication and supplement protocols
Your medication and supplement regimen is not generic. Every element has been calibrated to your individual physiology, hormone levels, and specific fertility profile. Adherence to your personalized protocol is absolutely critical because even small deviations in timing or dosage can compromise your cycle results. This step transforms your understanding from passive patient to active participant in optimizing your reproductive environment.
Your clinic will provide you with a detailed medication schedule approximately one to two weeks before your transfer cycle officially begins. This schedule specifies exactly when to start each medication, what time to take it, the precise dosage, and the route of administration, whether oral, intramuscular injection, or vaginal suppository. The most common medications include estrogen to support endometrial thickening, progesterone to prepare the uterine lining for implantation, and sometimes low-dose aspirin to improve blood flow. Individualized protocols for embryo transfer preparation include administration of hormonal treatments such as estrogen and progesterone calibrated to your physiology to enhance implantation likelihood. Your clinic may also recommend supplements such as coenzyme Q10, vitamin D, prenatal vitamins, and inositol based on your baseline lab results and specific diagnoses. Some patients benefit from additional supplements targeting inflammation or immune function. Request a written handout detailing every medication and supplement, including what it does, when to take it, potential side effects, and what to do if you miss a dose.
Set up a system that works for your lifestyle to ensure consistent adherence. Some patients use pill organizers with alarms on their phones, while others rely on calendar alerts or smartwatch reminders. If you receive intramuscular injections, ask your clinic’s nursing team to demonstrate the injection technique multiple times until you feel confident, or arrange for your partner or a family member to administer injections if needles make you uncomfortable. Store medications exactly as directed, as temperature and light exposure affect potency. Keep backup supplies in case of accidental breakage or loss. If you experience side effects such as bloating, mood changes, or headaches, contact your clinic immediately rather than adjusting doses on your own. These symptoms are often manageable with minor protocol adjustments, but unaddressed side effects can cause you to miss doses or abandon the protocol entirely.
Progesterone supplementation deserves special attention because it directly supports the uterine environment needed for embryo implantation. Your clinic will specify the exact form, whether vaginal suppositories, intramuscular injections, or oral micronized progesterone. Do not switch between forms without explicit approval because bioavailability differs significantly. If you are prescribed progesterone suppositories, insert them high in the vagina, ideally after lying down for 20 to 30 minutes to prevent them from leaking out. Continue progesterone for the entire duration specified by your clinic, typically through 10 to 12 weeks of pregnancy if implantation is successful. Stopping early, even by a few days, can compromise early pregnancy viability. Maintain a medication log throughout your transfer cycle, noting the time you took each medication and any symptoms or concerns. This record helps your clinic troubleshoot if anything seems off and provides documentation for insurance purposes.
Pro tip: Create a simple spreadsheet or print a calendar with each day marked by medication type and time, then physically check off or initial each entry as you take medications, because this tactile accountability system prevents the anxiety of wondering whether you actually took your dose and catches missed doses immediately rather than discovering them days later when it is too late to adjust.
Step 5: Verify optimal timing and readiness for embryo transfer
Timing is everything in embryo transfer, and this step is where precision becomes your advantage. The window between when your uterus is ready and when your embryo is developmentally prepared is narrow, typically just 24 to 48 hours. Verifying that both you and your embryo are synchronized ensures your transfer happens at the exact moment when implantation likelihood peaks. This verification involves multiple clinical assessments that your fertility team will coordinate in the days leading up to your scheduled transfer.
Your clinic will monitor your endometrial development through serial ultrasounds beginning about five to seven days after you start progesterone supplementation. During these ultrasounds, your fertility specialist measures endometrial thickness and evaluates its appearance, specifically looking for a trilaminar or multilayered pattern that indicates optimal receptivity. The ideal endometrial thickness falls between 8 and 14 millimeters on the day of transfer. Your clinic will also track hormone levels, particularly progesterone and estradiol, to ensure they are rising appropriately and confirming that your body is responding correctly to medications. Optimal timing based on endometrial receptivity ensures synchronization between embryo stage and uterine environment, which directly improves implantation success. If your endometrial thickness is below eight millimeters or if hormone levels suggest inadequate preparation, your clinic may recommend delaying transfer by several days to allow more time for development, or in rare cases, canceling the cycle to try again in subsequent months.
Simultaneously, your embryo is being evaluated for readiness. If you are doing a fresh transfer, your embryologist monitors your developing embryos daily, selecting for transfer those that have reached the optimal blastocyst stage, typically around day five or six of development. If you are doing a frozen transfer, your clinic thaws your previously frozen embryo and assesses its survival and continued development before transfer. Some clinics use advanced time-lapse imaging technology to track embryo development minute by minute, allowing for more precise selection of embryos with the highest implantation potential. Ask your clinic whether they use such technology and how it influences their embryo selection process. Best practices for embryo transfer include ultrasound-guided assessment of endometrial morphology and synchronization with embryo development stage to ensure transfer occurs at the ideal moment.
In the 48 hours before your scheduled transfer, your clinic will confirm the transfer date and time with you, often via phone or message. They will provide final instructions about medication timing, whether you need a full bladder for the procedure, and what to expect during the transfer itself. Do not make any significant changes to your routine in the final days before transfer. Continue taking all medications exactly as prescribed, maintain your stress reduction practices, and avoid excessive heat from hot baths or saunas, which can compromise progesterone absorption. If you have any concerns about whether you are truly ready, express them to your clinic. Sometimes minor adjustments, such as one additional day of endometrial preparation or a slight medication tweak, can optimize outcomes. Trust the clinical data your team is gathering, but also advocate for yourself if something feels off.
Pro tip: Ask your clinic to provide you with written confirmation of your transfer date, embryo number and grade, endometrial thickness measurement, and any other key metrics from your final readiness assessment, so you have a clear record of the conditions under which your transfer occurred and can reference this information if you need to discuss outcomes or plan future cycles.
Prepare for Embryo Transfer with Confidence and Speed
Embarking on embryo transfer can be overwhelming with so many critical steps like consultations, AI-guided assessments, personalized medication protocols, and precise timing for optimal uterine receptivity. If you are searching for a fertility clinic that truly understands these challenges and offers cutting-edge AI technology combined with compassionate care, look no further than Aurea Fertility. Our advanced embryo monitoring and AI-assisted decision making simplify complex processes and enhance your chances of success while reducing time and cost.
Take control of your fertility journey today by choosing a clinic that prioritizes your unique needs, fast treatment pathways, and round-the-clock communication support. Discover how personalized care and innovative technology come together to create better outcomes at Aurea Fertility. Ready to get started or have questions about your specific plan? Schedule your initial consultation now and transform your embryo transfer experience with expert guidance and AI-driven precision.
Frequently Asked Questions
What should I discuss during my initial consultation for embryo transfer?
During your initial consultation, focus on your medical history, previous pregnancies, and any health conditions. Bring a list of questions about treatment plans, success rates, and embryo transfer protocols to ensure you leave with the information you need.
How can I ensure my lifestyle supports successful embryo transfer?
To optimize your chances for a successful embryo transfer, focus on a nutrient-rich diet, regular moderate exercise, and stress reduction techniques. Aim to establish these healthy habits at least 3 to 4 weeks before your transfer to allow your body to respond positively.
What types of lab tests and assessments are necessary before embryo transfer?
Key assessments include blood tests to evaluate hormone levels, imaging to assess uterine health, and AI-guided embryo evaluations. Complete these tests early in your fertility cycle to allow your clinic time to tailor your treatment plan accordingly.
How do I follow my medication protocol accurately during the preparation?
Adhere to your personalized medication schedule by setting up reminders using your phone or calendar. Keep a medication log to track doses and ensure you maintain consistent timing, which is crucial for your treatment success.
What steps should I take to verify timing and readiness for embryo transfer?
Monitor your endometrial development through scheduled ultrasounds and hormone level checks leading up to your transfer. Ensure that both your uterus and embryo are ready by confirming key measurements and growth stages with your clinic 48 hours before your procedure.
How can I manage stress leading up to my embryo transfer?
Incorporate mindfulness practices, such as meditation or gentle yoga, into your daily routine to help manage stress. Aim for at least 10 minutes of mindfulness each day to promote a calm state of mind, which is beneficial for your embryo’s implantation environment.
Recommended


Comments